Wednesday 31 July 2013

Making a Worm Farm

To compliment our little veggie patch, I've been wanting to build a Worm Farm for some time. Worm Farms are great for eating your garden scraps and they produce amazing liquid fertiliser for the garden. Also what toddler doesn't like looking at and picking up worms?
GiGi and I made a 'Do-it-yourself' type worm farm out of a few polystyrene boxes from our local fruit man. I know polystyrene is terrible for the environment, but at least we've given it a second life.

Step 1: Gather materials
- Two polystyrene boxes
- shredded newspaper
- mulch/ straw
- hessian sack/ flyscreen/ shade cloth
- enthusiastic toddler
- hungry cat (optional)

Step 2:
Using a stick, punch holes along the top of one polystyrene box for ventilation and along the bottom of the box so the juicy worm juice can drain out.

Step 3:
Line the bottom of the box is hessian or fly screen so the the worm juice can get out but the worms stay in.


Step 4: put about 5cm of shredded newspaper over the top of the hessian. shredding the newspaper was GiGis favourite part of the whole process. 


Step 5: Add about 10cm of mulch. I used Straw bale mulch left over from mulching the veggie patch.


Step 6: Find a flat, shady spot and make a base for your worm farm. Apparently its important for the worms to be in the shade. I made a base out of a few old bricks I got from my brother (he's a builder and often has left-over materials). You could also make a base out of some rocks and a few planks of wood.


Step 7: Lightly water the mulch so that it is a little damp.

Step 8: Fill the box with soil. Luckily my parents have goats and horses so this is a lovely mix of horse and goat poo and dirt. Yum, Yum for the worms.

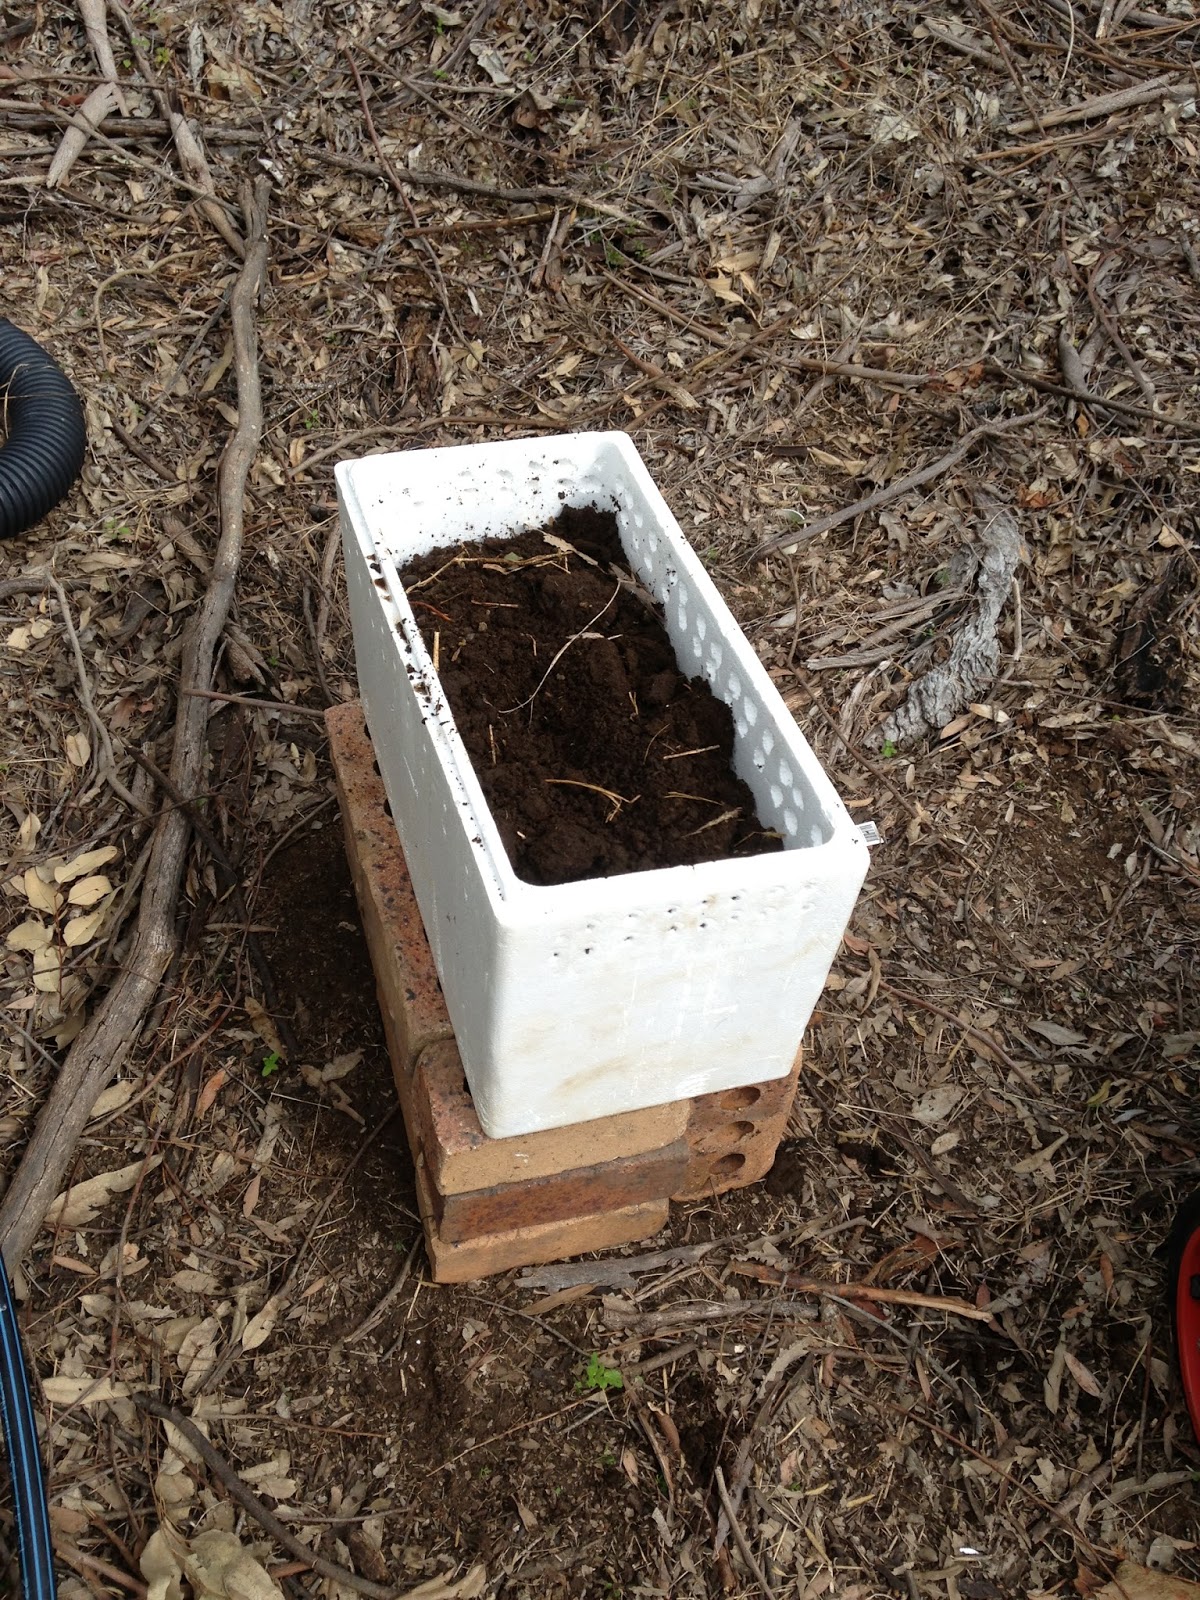
 Step 9: Cover the dirt with a few pieces of newspaper to maintain a constant temperature, put on the lid and put it on top of the other box on your stand. I put rocks on the top to stop the lid from blowing off or being removed by curious toddlers.

The worm wee should fall through the holes in the bottom of the top box and collect in the bottom box. More advanced worm-farm builders buy a tap from the hardware to put in the bottom box to easily access the worm-wee. However i considered it to be an unnecessary cost for us at the moment. I plan to just lift the top box off and tip the worm-wee from the bottom box into a bucket to be diluted and used in the garden. Perhaps over time this method will irritate me and I'll end up buying a tap but for now, this will do fine.
I'm yet to purchase some worms, I'm hoping to source them through my local Community Exchange, rather than buy them.

Practical Garden Art

A few weeks ago, Gigi and I spent the weekend beautifying our veggie patch and building a worm farm. We have bit of variety in our garden now and I've been thinking a lot about garden markers. I've seen some very lovely ones on 'etsy' and 'made-it' but have wanted to make some myself in the spirit of living simply and being frugal.
I saw an inspiring picture on the Internet and thought it would be a great activity for Gigi and I to do together. We collected a variety of smooth rocks of varying size from a nearby river and spent the morning painting them. 
Gigi decided she wanted to use her hands rather than a paint brush. Rather than rocks decorated to look like veggies, as per the inspirational picture, our rocks are decorated with Gigi's hand-prints and foot prints. Not only are they a cute garden decoration, but they are also a nice bit of memorabilia. 
We started off by washing the rocks in vinegar and water with a scrubbing brush. After they had dried off, we painted them with some old art paint I had. I think the paint was water based acrylic, so after it dried I sprayed it with a can of paint sealer specifically for toys/crafts/outdoor ornaments. Hopefully it waterproofs Gigi's lovely works of art. The cost of the project was $10, which was for the can of sealer. There plenty left, which we can use anther day. We now have some lovely and unique garden markers, had a great day in the garden and only spent a small amount of money.


Keeping a Blog Attempt #2

After attempting to start (and Failing to keep up with) a blog over at BlogHer, I've decided to start again here in the hopes i'll be able to navigate this website a little easier. I admit to being quite technology-challenged and i'm ok with that. 

I'll start by introducing myself and what I hope to acheive with my blog. 
I grew up in the Sunshine Coast hinterland on my parents 20-acre hobby farm. My dad is a hippy/anarchist from the 70/80s, my mum is a very out-doorsy/do-it-yourself/hard-working person. Their attitudes, combined with taking my brother and I to the Woodford Folk Festival every year since 1994, have given me an interest in the environment and a passion for wanting to create a better world. 
In the years since high school ended, I've finished a university degree, made the most beautiful friends, and travelled extensively through Europe and Asia.
These days, I'm a Mumma to my amazing 2-year old daughter, who calls herself "GiGi". I've recently become a single mum and am still trying to find my feet, whilst creating a new life for myself and my daughter. 
I have recently moved back to my hometown and into the sanctuary of my parents home, the home that I grew up in.
The main aim of my blog is a record of my progress as I pick up the pieces of my broken life and figure out where to from here. I also want to connect via the online-world with others and form friendships, as I'm geographically isolated from my 'real-world' friends.
From here, my main 'life-plan' is to journey into the world of Community Exchange, Permiculture, Sustainable Living and Living Simply, not to mention trying to continue with my green/relaxed parenting methods. 
So let the blogging begin.....