Sunday 27 April 2014

Mount Ngungun....Abseiling this time

I said I couldn't get enough of this mountain... hahaha. On Sunday, Gigi spent the day with her Nana, while I joined an abseiling group on my current favourite mountain....
About to get 'hooked up' 
Allons-y!


I went on my own, which is a HUGE step for me as I'm shy and reserved. I had a great time and after a while had no worries with joining in the general chat of our little group. A few people in the group even offered to take some photos for me, so happily as well as my 'selfies', I have a few action pics as well. We started on a 10m cliff-face about halfway up the mountain, before making our way to the 20m cliff at the top of the mountain.

I'd never been abseiling before, but it was fairly easy and lots of fun. Plus, those views....

At the top of the cliff...
On top of the mountain with my excellent helmet

More Bushwalking at Mt Ngungun

Since climbing Mt Ngungun for the first time last week, I can't get enough of it. The 360 degree view at the top is just amazing. A girlfriend and I climbed the mountain to watch the sunrise on Anzac Day. It was just amazing.....


Thursday 24 April 2014

Bushwalking- Mount Ngungun

We are lucky enough to live on the Sunshine Coast Hinterland, which is an absolutely beautiful part of the world. However, I'm ashamed to admit that despite all of the beautiful places within 45 minutes drive, I've not visited many. So last year I decided to become a 'local tourist'. I went to the local tourist information centre, grabbed a heap of brochures and am slowly making my way through the local attractions. Now that the weather is starting to cool down, Gigi and I can start doing some more bushwalking on a weekend.

Last weekend, for the first time we climbed Mount Ngungun. As the picture show, it was beautiful. It was an easy enough climb for Gigi to do on her own, I only put her in the backpack at the top as its quite steep and there are no safety rails. Despite this, there were plenty of families and kids of all ages doing the climb....
Gigi on the way up

View from the top

Not impressed to be in the baby backpack 


Happy Easter


I know its a week late, but Happy Easter.

The Easter Bilby prepared a treasure hunt for Gigi to find her Easter Egg this year. On scrap paper was drawn a picture of a piece of furniture in our house. At that piece of furniture was another picture with another piece of furniture and so on, until the clues led to the Easter Egg. Gigi got the idea of the game after two clues and excitedly went from one clue to the next. The Easter Egg at the end was a huge surprise for her, as we rarely eat chocolate. She was allowed to eat it after we had our real eggs for breakfast and even shared a bit with Mumma!

Real Eggs for breakfast from our local free-range farmer


 Gigi was super excited that the Easter Bilby had visited.


.


Passion Fruit Teepee

When I purchased my little cottage, it had a cute little garden at the front that was completely overgrown and filled with Agaves and Yuccas. I hate Agave and Yucca, so they were ripped up pretty quick and given away via my local community page on Facebook.

Underneath those trashy plants was a rather bedraggled passion fruit vine. Hurray! Released from the undergrowth, it went crazy in all directions.  In order to contain it (it was starting to grab my front porch posts), I decided to build a Teepee as a trellis. Some time ago I'd seen a picture of a Teepee trellis for beans and tried to emulate it, but it was a dismal failure because my beans kept dying.

As I'd chopped the bamboo by hand, there was no way I was going to throw it out, so its been sitting in the shed for months waiting to be re-used.

I hammered some stakes into the ground and tied the bamboo onto the stakes with wire.


The Bamboo is attached at the top with Baling twine and I also used baling twine to attached the bamboo 'cross-bars'. Baling Twine is that string that comes around bales of hay and is the best stuff ever for a huge variety of uses. I loosely tied the passion fruit vine onto the teepee using butchers twine. Eventually the butchers twine will rot off because its made from cotton and will cause minimal damage to the plant. When staking or tying up plants, plastic or wire shouldn't be used, only material that will eventually rot. 


Anyway, this only took me about an hour to do and I think it looks super cute. I mulched underneath so nothing would grow and added a log on top of two bricks to make a little bench. In a year or so this will make a great little hide-away for Gigi to play in. 


Wednesday 23 April 2014

Herb Spiral

It was my Mums Birthday back in March, so I decided to build her a herb spiral on a useless patch of dirt next to their shed. The ground was gravelly from being levelled over twenty years ago for the Shed building pad. Nothing really grew on in because the soil was so compacted. So it really was the perfect place for a herb spiral, as close to the house as possible.

I gathered a second pile of bricks and painted them with terracotta paving paint. Gigi was able to help out with the painting and she loved it. By the end, all the bricks were painted, as was the concrete path, some grass and Gigi. To minimise the ugliness of the shed a screwed some old bamboo screening (originally from Bunnings, but purchased second hand from a garage sale) onto the shed.

I marked out the herb spiral area with sticks (easier to adjust and move), then put down several layers of newspaper to reduce weed growth and then marked out the spiral with bricks. I then stacked the bricks as shown for added support. On the bottom several layers, I put down branches, sticks and leaves almost to the height of the second layer of bricks. I did this to reduce the amount of dirt I'd need to use. Later I discovered that the practice of adding sticks/logs/branches to make a raised garden is known as  Hugelkultur (http://www.richsoil.com/hugelkultur/) and is widely practiced as part of the permaculture movement. 


In the centre of the Spiral I placed an old PVC pipe to act as an in-situ compost bin (also painted with paver paint). I drilled holes along the length of the pipe and pushed it in between the sticks so it would stay upright. The idea is to add scraps and water to the pipe, which will decompose and add nutrients to the Herb Spiral.

On top of the sticks and branches, I piled soil and then planted my herbs. At the top of the spiral is Basil and Rosemary, followed by Oregano and Mint. Chives and more Basil are at the mid level, with Dill, Gota Kula, Sorrel and Parsley at the bottom level, which is also the southern side of the Spiral.


At the end I mulched the whole thing with Sugar Cane Mulch and added a few pots of Lemongrass in front of the bamboo screen. As the soil settles and the branches decompose, I may have to top up with more soil. I also planted some Marigolds in the brick holes as a bug repellent and because they look pretty.

I'm pretty happy with the end result and my Mum was super happy with her Herb Spiral. My Dad has been trying lots of different combinations to his cooking.

The Herb Spiral about three weeks later

Sunday 6 April 2014

Fence building weekend

So my property was basically un-fenced when I purchased it. No front fence, a barbed wire rear fence, half a fence on one side and a fence that was just about to fall down on the other side. I will be fencing the whole 3/4 acres with something that is Gigi-proof, dog-proof, chicken proof and goat proof. I've decided to go with a paling fence along the front and a post, rail and dog-wire fence along the sides and rear.

In keeping with my no money/frugal theme, I will be building it myself, with help from my family, mainly my dad and brother. The weekend just gone, I had a fence painting working bee with family and friends and we managed to get half the fence painted and put up. As the saying goes, many hands make light work. It only took six people about 6 hours to paint the posts, rails and 250 fence palings (front and back). There's still another 250 to paint and put up, which I'll have to find time for.

Here are a few progress pictures of the whole process...

First Day, pegging out the posts

After a hard day of concreting the posts in. 

Posts and rails. 


Got the Mail box up too. 

Dad just about to start putting the palings up. 

The paling painting station. Underneath the blue shelter is my mum and a friend, under the shed is my grandpa. Still going strong in his late 70s.

Some of the troops admiring the finished product. 
There were four generations of my family helping out on the weekend. My daughter, myself, my parents and my grandparents. Gigi loved painting, for the first hour, she actually painted the the fence palings, then she painted a few rocks, then my garbage bins. After lunch, my grandmother took her to the park for a play.
My grandfather was a builder before he retired a few years ago, so he really enjoyed the weekend.

I'm very grateful for the help I received from my family and friends. It would have taken a very long time to do it on my own.

Tuesday 1 April 2014

Gardening so far....

As I mentioned in my previous post, our block was pretty much bare when I purchased it. This has its pros and cons. Obviously, the best this is that I can plant what I want, where I want according to my own needs and plan. The worst thing is that there are no mature trees, so any gardens I plant will have to be artificially shaded for several years until my trees start to grow.

My grand-scheme, regarding landscaping is to only plant native or food-producing vegetation. So far I'm going pretty well, although I have planted two Magnolias (bought for someone else, but didnt want them) and a some citronella geraniums, wormwood and lavender around the patio to act as insect deterrents.

The first thing I've been working on is screening hedges. I don't want a 1.8m high fence around my block because I think they look awful and I can't really afford one anyway. I have two neighbours to the north-eastern boundary (soon to be three); one neighbour at the rear and one neighbour on the south-west.
I bought Lilly Pilly tubestock for the major screen near the boundary and various shrubby natives to be planted in front of the hedge for habitat diversity and I thought it would look nice.

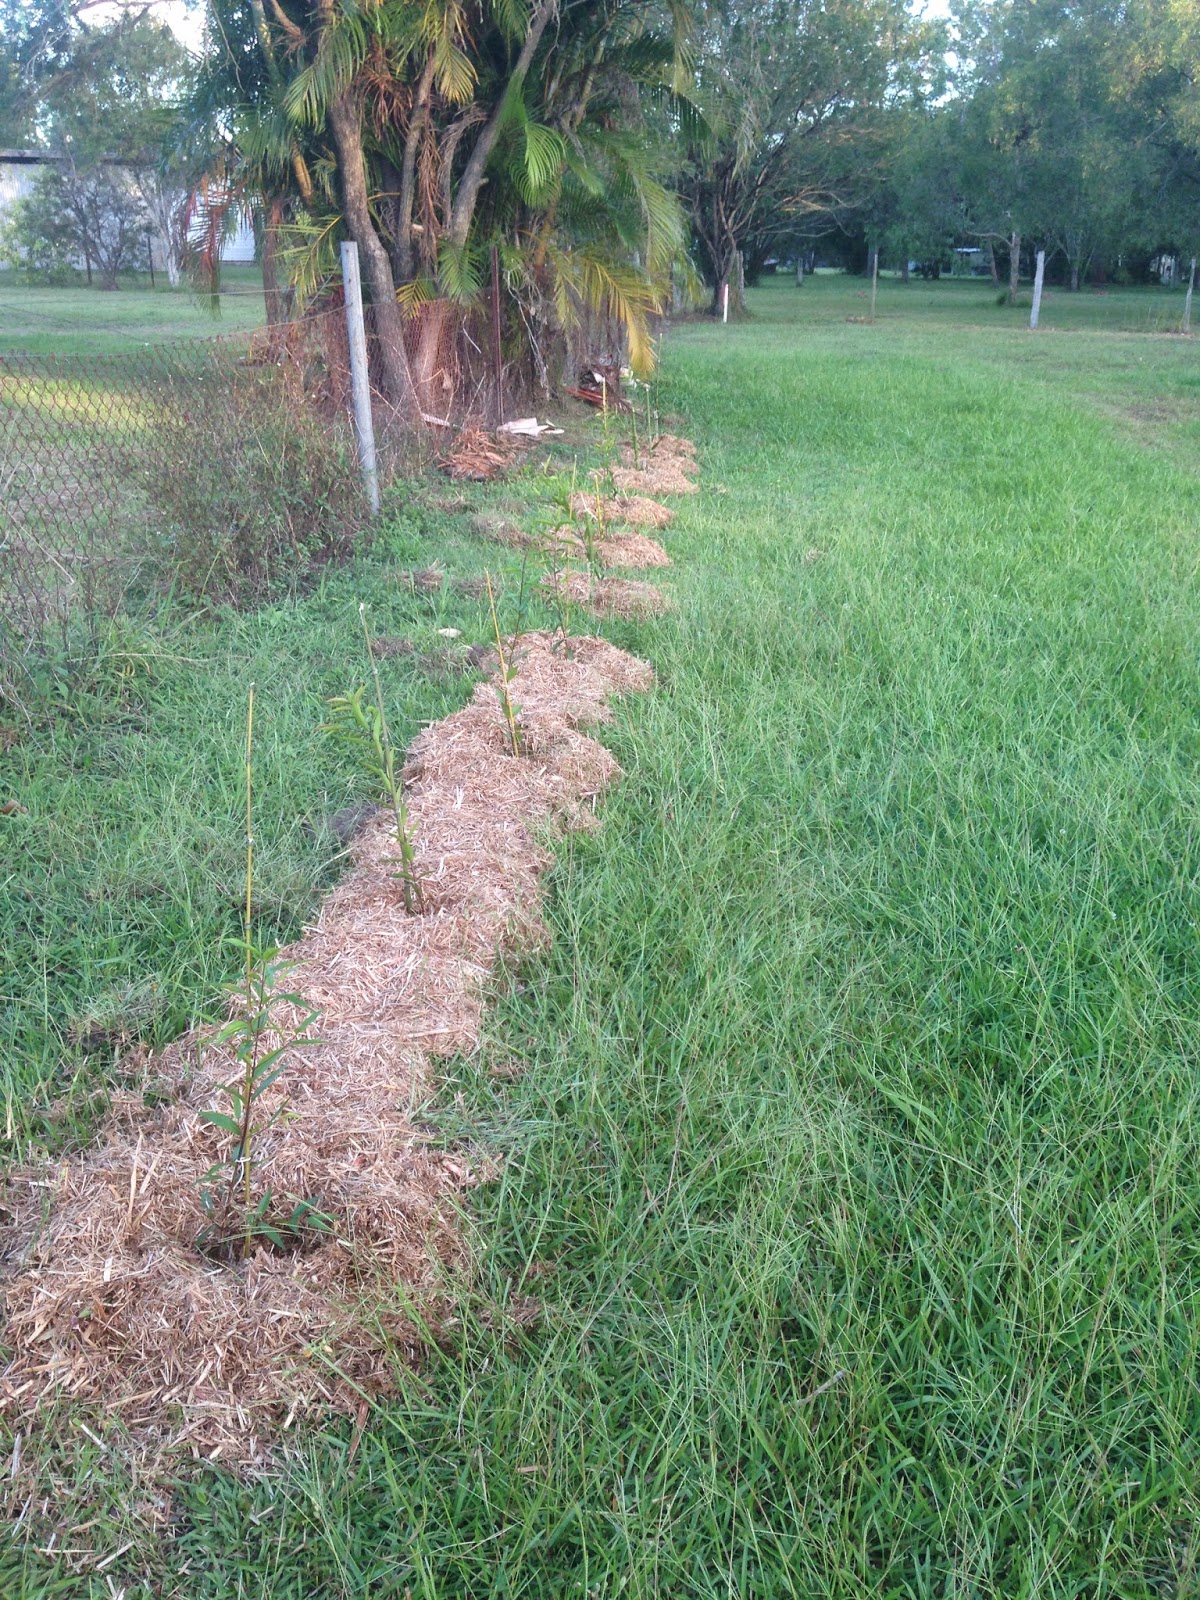
First row of screen trees planted. 

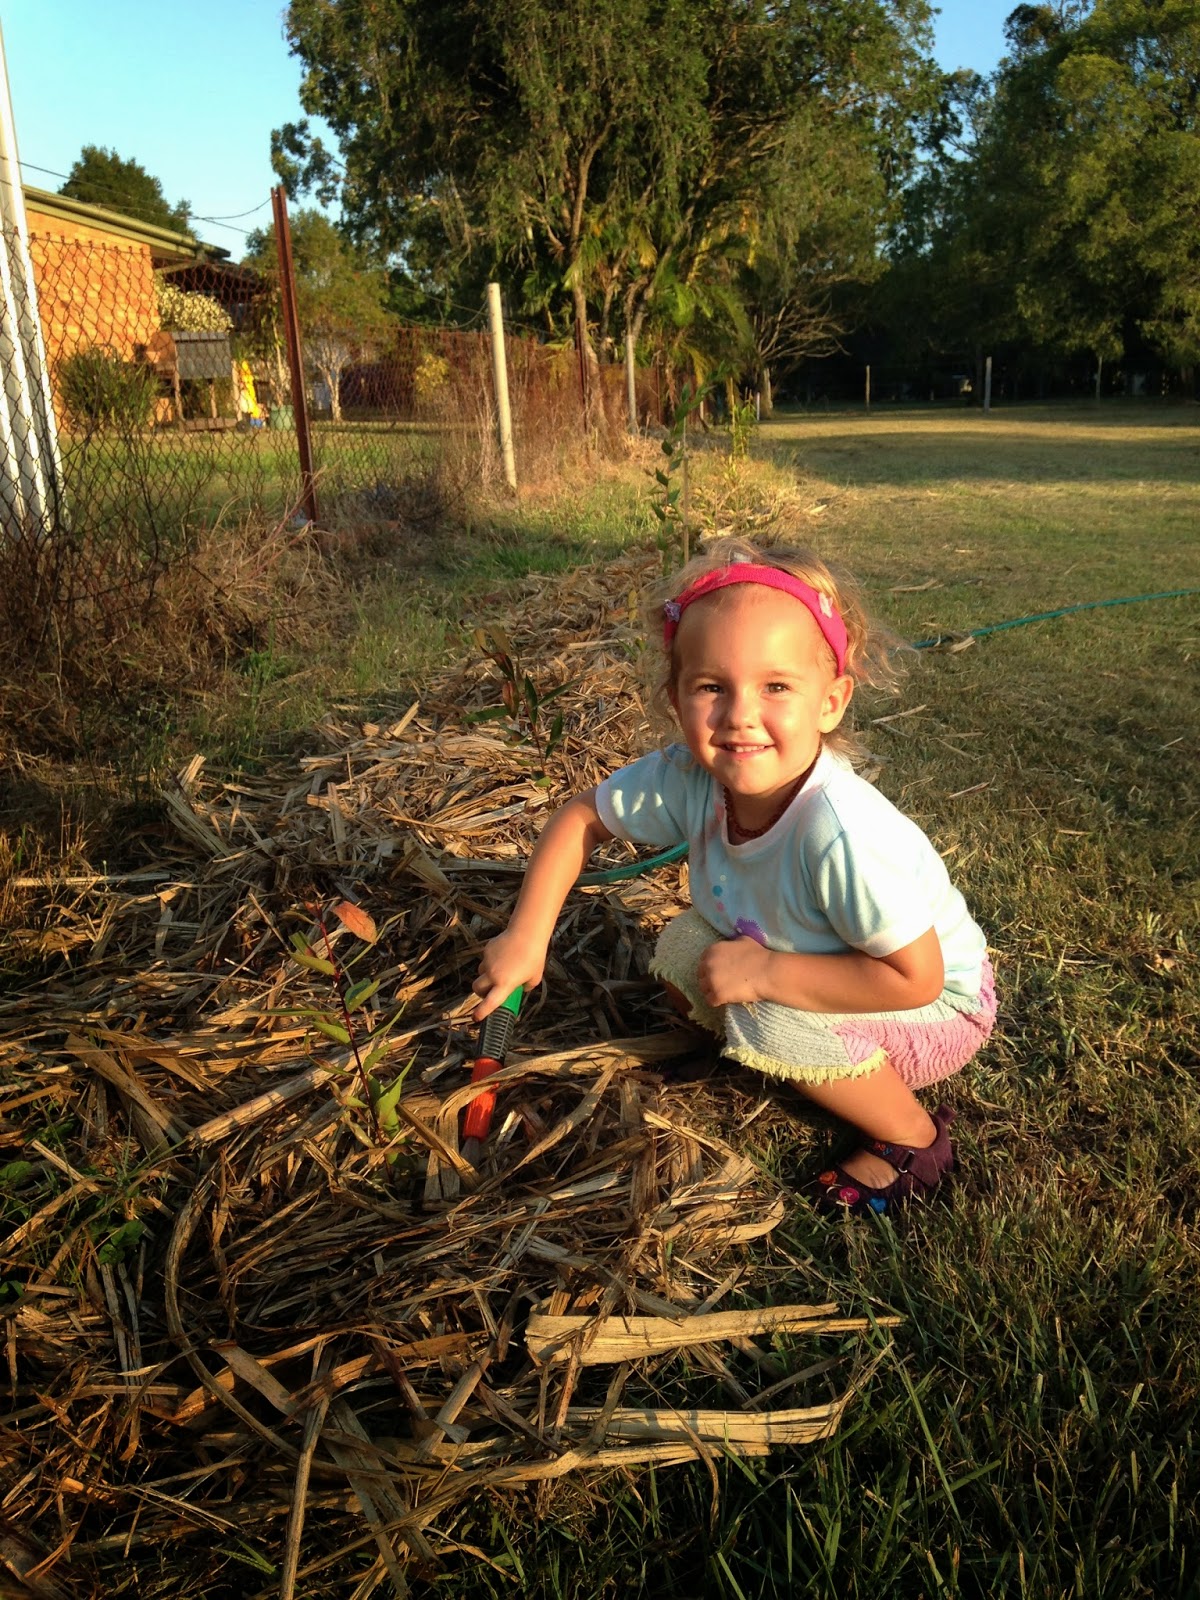
Gigi loves to water the garden. 
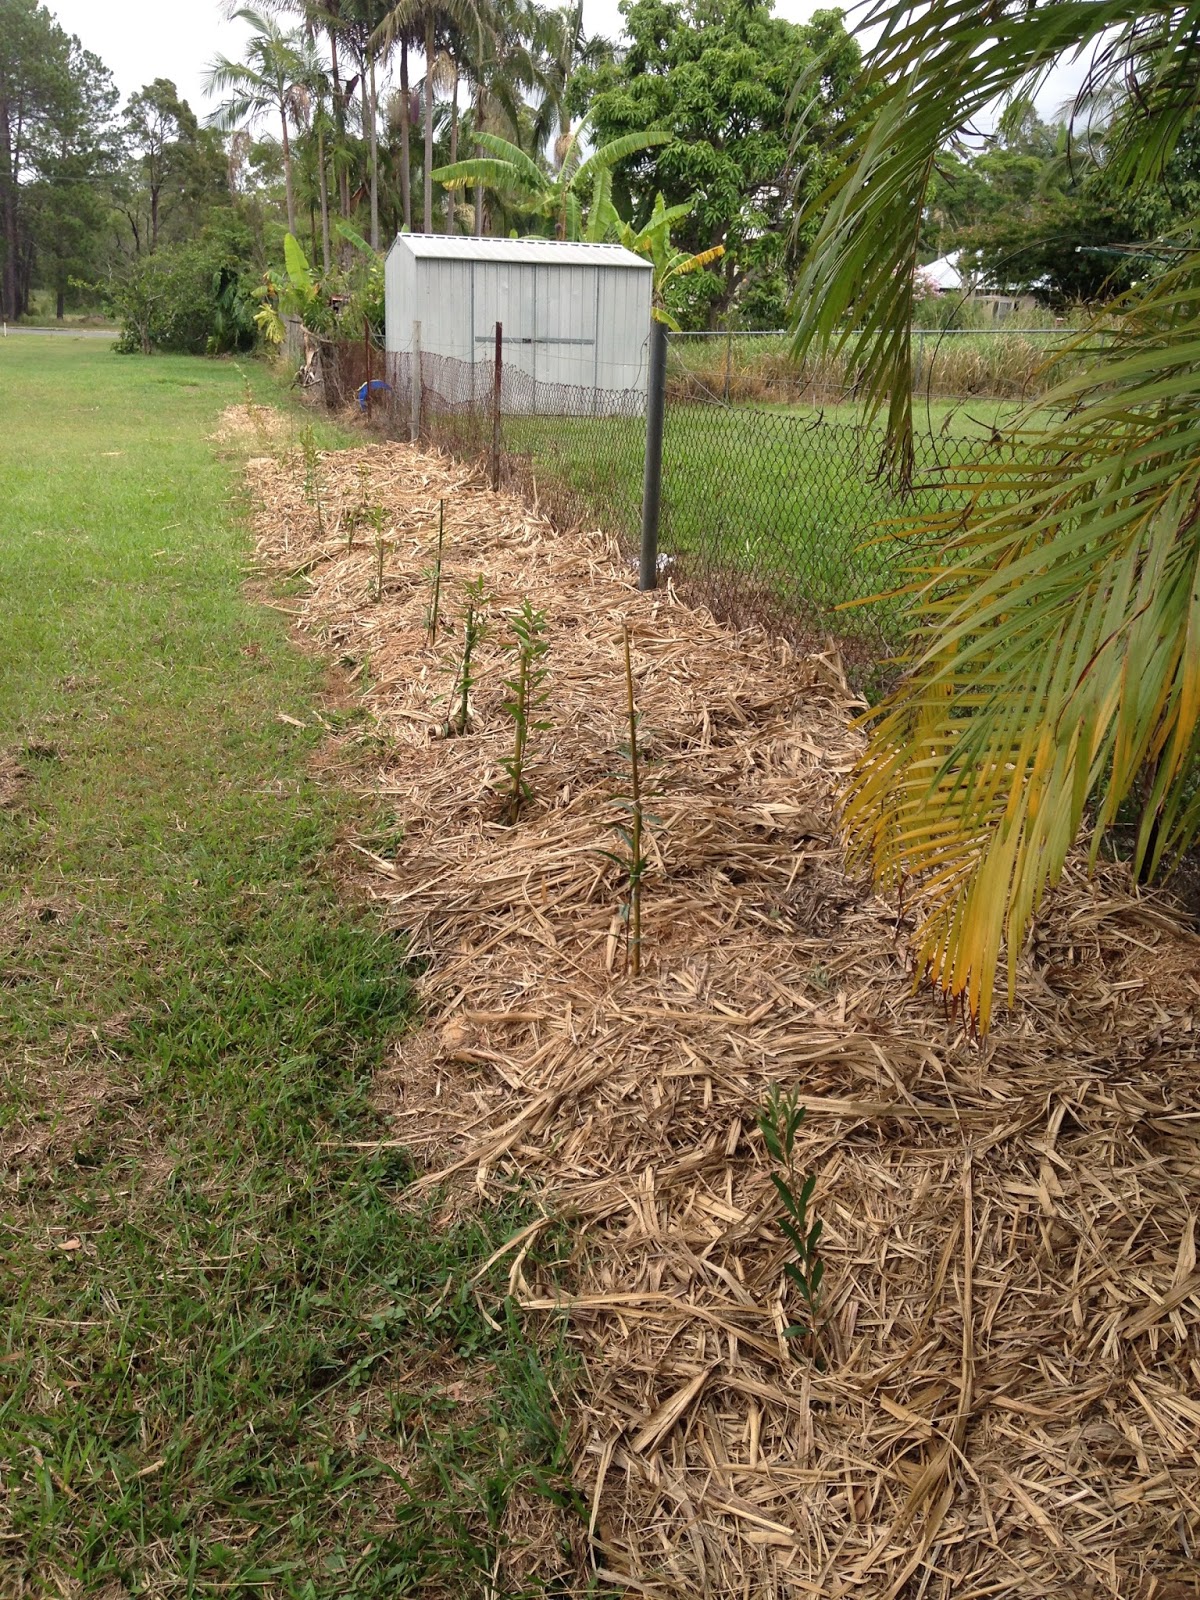
mulched out with second row of shrubby trees


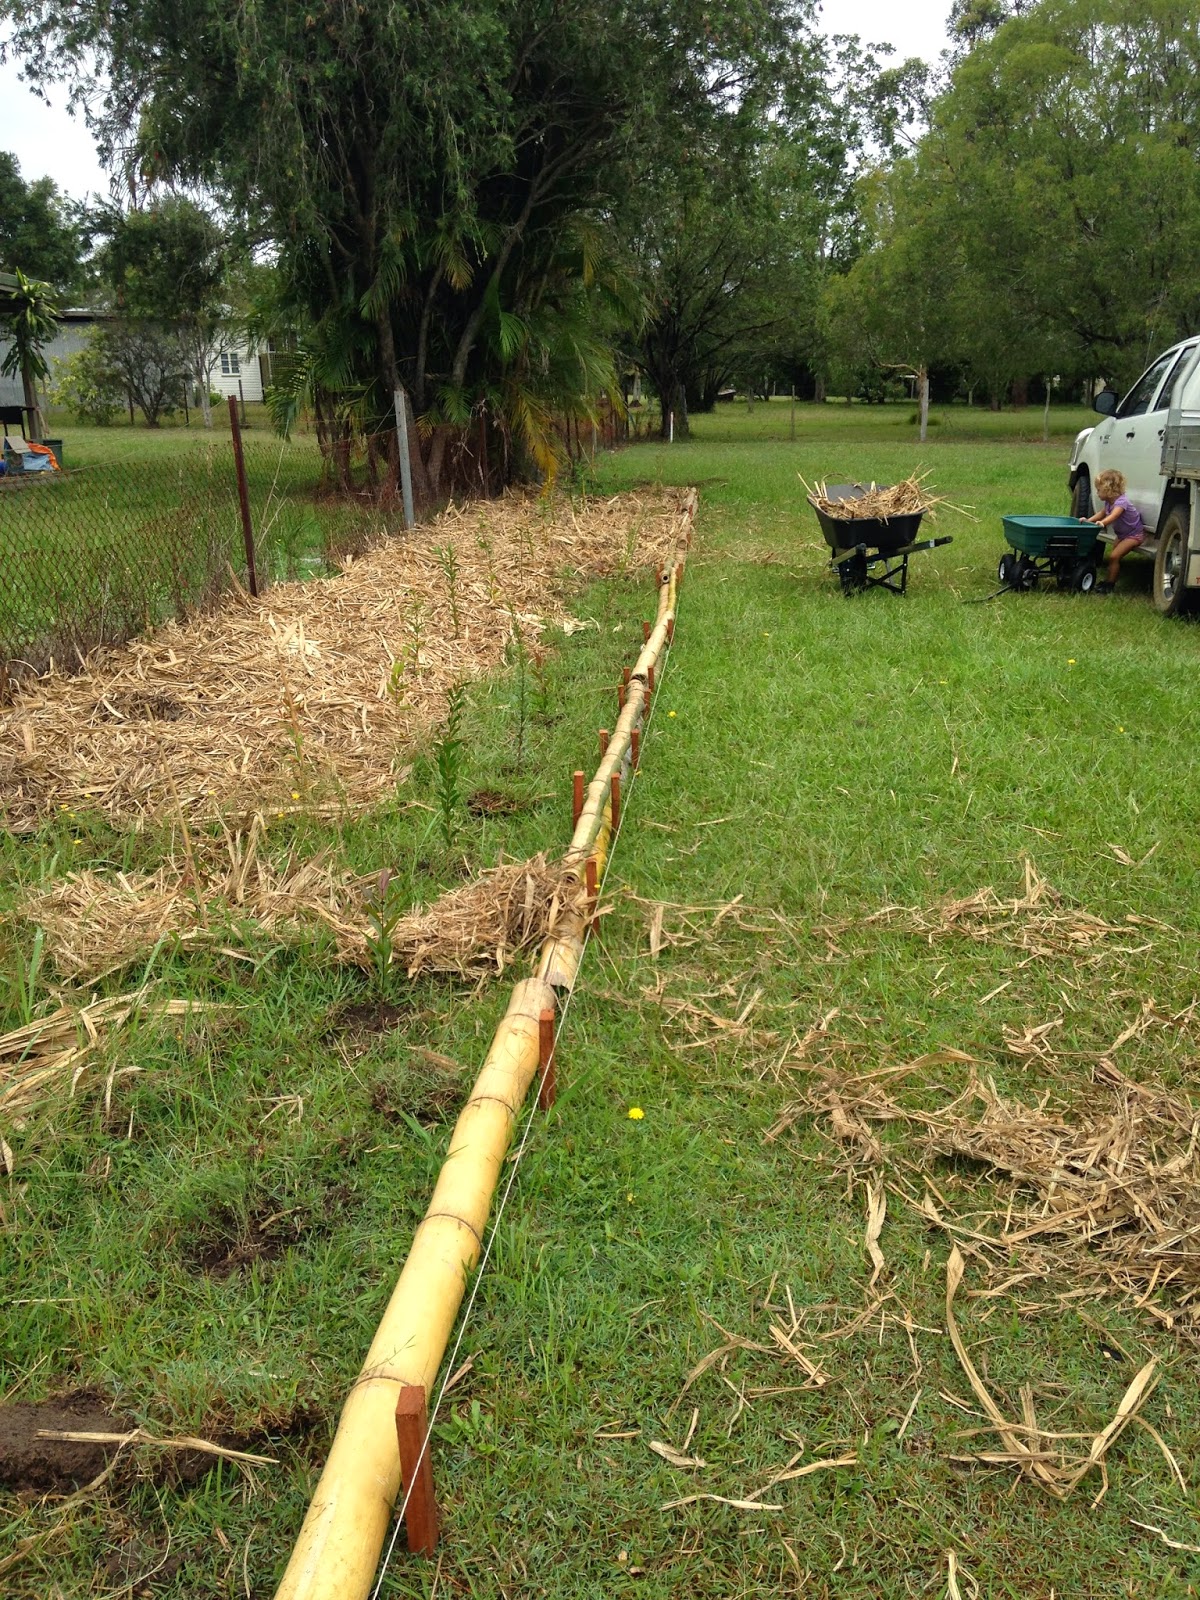
I've mulched right to the boundary because I don't want to try and mow behind the trees or in between the trees. Due to the slight slope of my block, I needed some garden edging to keep my mulch in place. Everywhere I looked, garden edging to buy was to expensive, so I decided to build my own. Theres a few 'wild' growing clumping bamboo on the roadsides around here. So I thought I'd attempt to build edging from bamboo, since it'd be free.

I borrowed a ute, took a saw and went and cut bamboo. To say it was hard work is a bit of an understatement. It took me two days to cut down, trim and build the bamboo edging. And I love it. Its not perfect, because the bamboo isn't straight. I havent treated it with anything either, so I'm not sure how long it will last before decomposing. But it was free, it just took some hard work and effort. I havent finished the garden yet, I eventually plan to continue the garden from the rear of the block, all the way to the front. I think I'll wait for the middle of winter though. I chopped bamboo on a hot, muggy day and it was not pleasant.

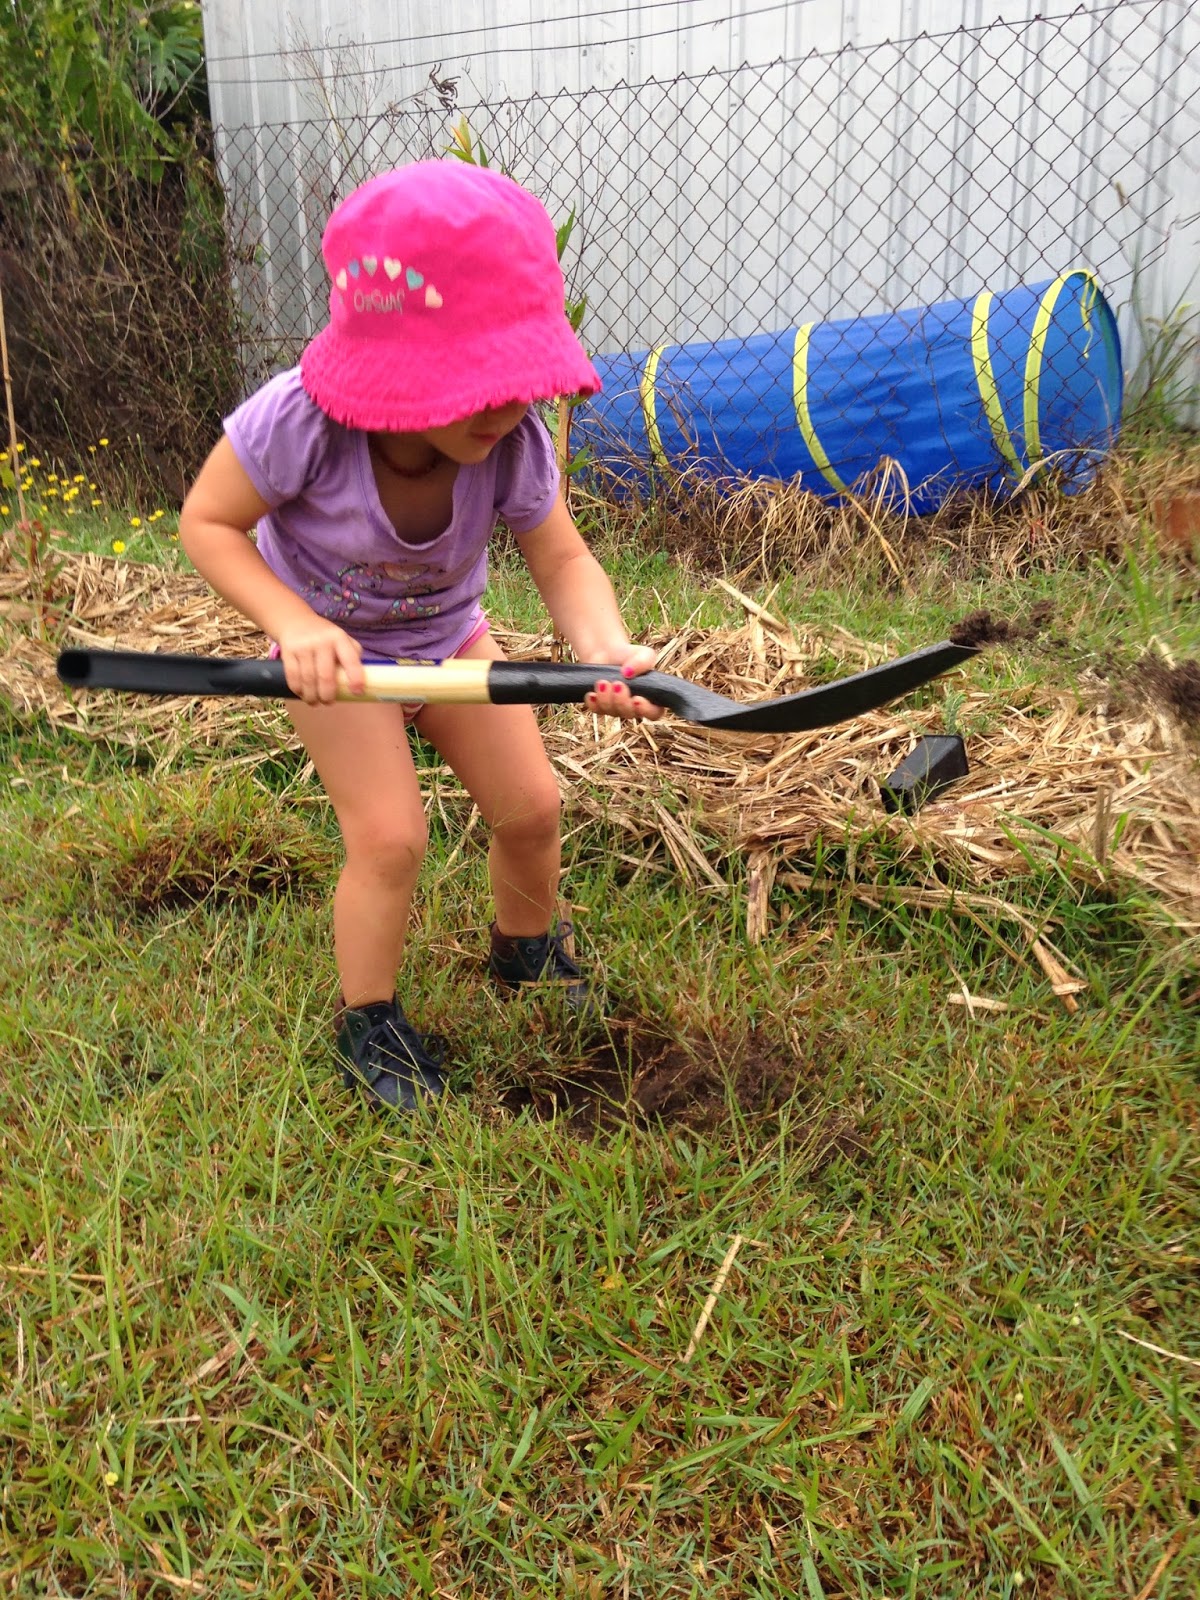
Gigi thoroughly enjoyed digging holes for the trees and throwing the mulch on the ground. I bought the little shovel pictured for $10 from our local market. Its a proper steel and wooden shovel. It will last years.
I also gave her a small hammer to have a turn at hammering in the stakes which hold the bamboo in place.

Gigi helping out

halfway through mulching
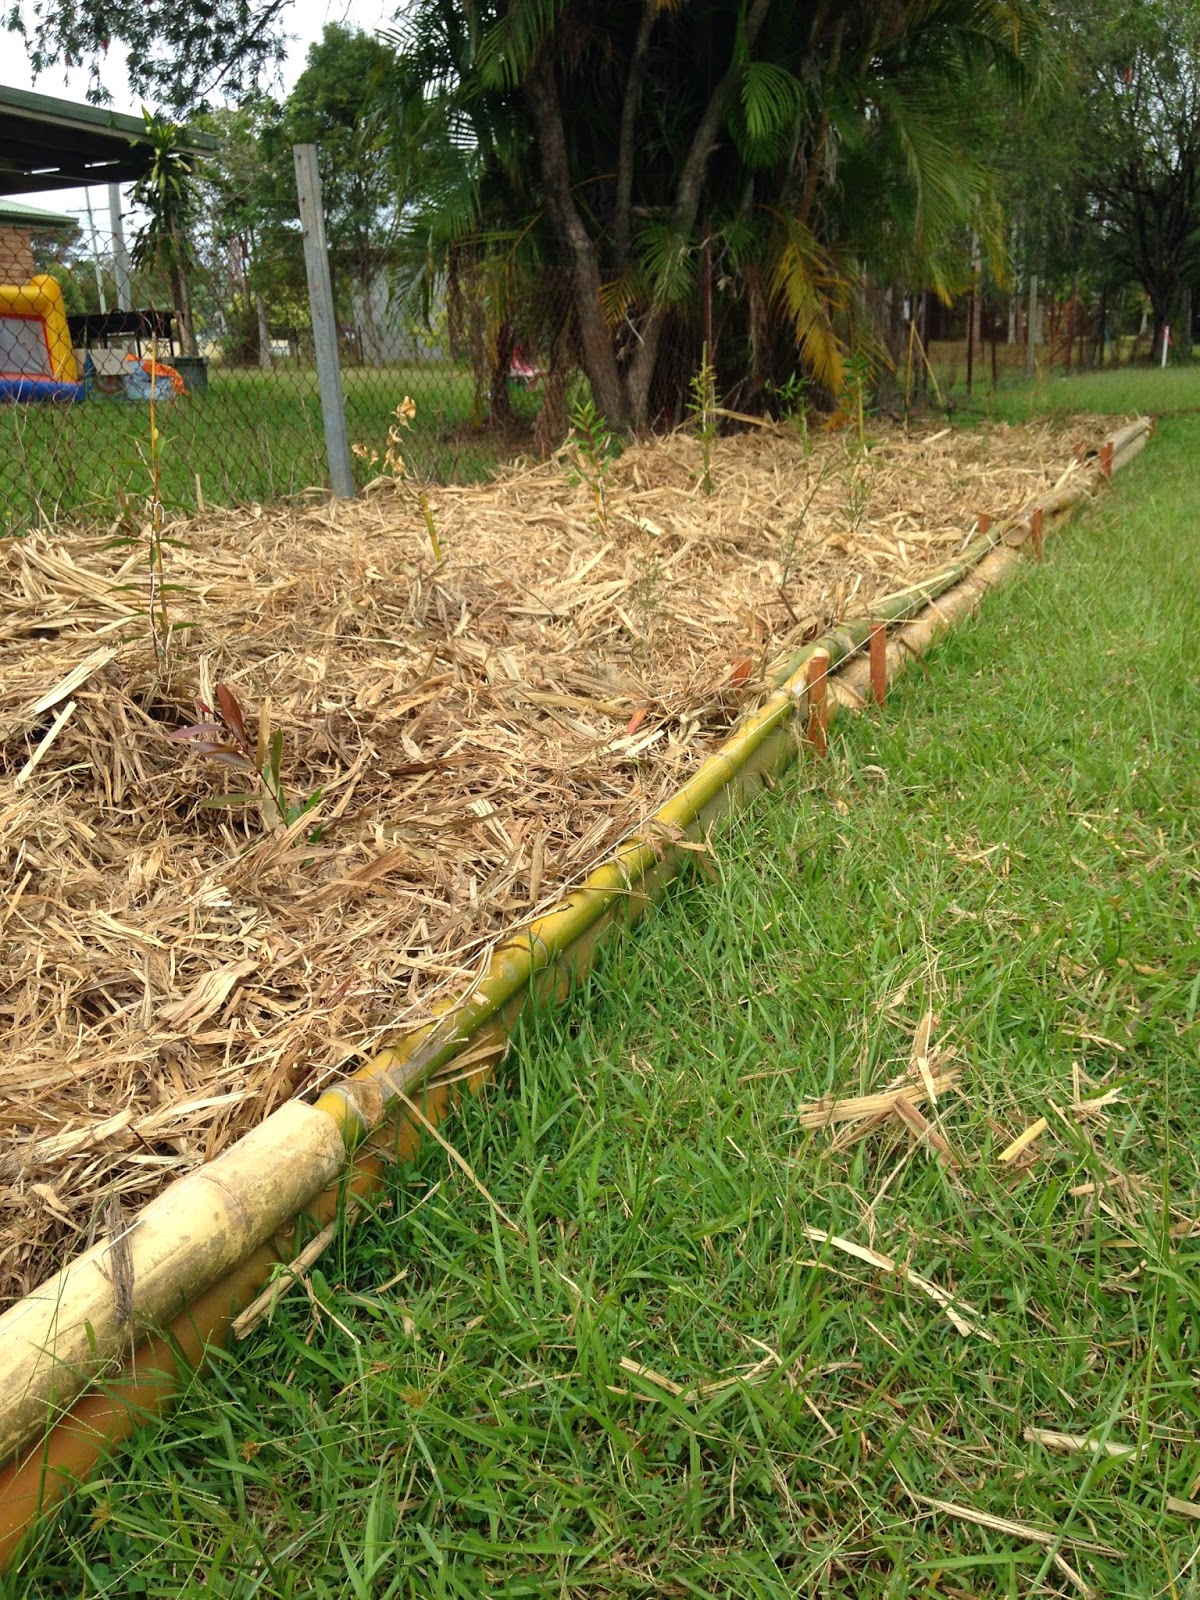
Finished
Beneath the mulch is a whole stack of cardboard boxes that we flattened out. The grass/weeds under the cardboard should die and the cardboard will hinder the regrowth. I got the cardboard from the industrial bins at the rear of the local grocery store. The store was happy for me to have it, and I was very happy to take it.


Yiiiiiiiikes!!!!

I can't believe its been almost a year since my last post!!!!

I've been incredibly busy, but that is such a poor excuse.

Shortly after my last post (in AUGUST of 2013!), my settlement period ended and I became the proud owner of my very first house! Perhaps house is a strong word for it, it is a small, one bedroom cottage with a tiny front patio. Its approximately 50m2 (yes, you read that right, 9 metres by 9 metres), including the patio. Whilst it is cute, it is also a real "fixer-upper". This year I plan to remove the existing bathroom and toilet and replace them , as well as add two additional bedrooms. I will be converting the existing studio bedroom, which comes off the kitchen (separated by a half-wall), into a dining area.

Proud new owners


Gigi excited about a bike ride


The best thing about our place is the land and its location. Its almost 3/4 of an acre and is 1.5km from the centre of our little town. We have cycled into town several times and Gigi loves it. I'm so excited for her to be able to ride her bike to school when it comes time.

I have so many exciting projects I'm planning for our house. When I bought it, there were only three small trees along one boundary and one small garden. I have big plans for a backyard garden and fruit orchid. I also want to get chickens so we can have fresh eggs and herbs. I've been reading a lot of organic gardening and permaculture books so I have some idea of what to plant and when. I'm hoping that we can produce the majority of our own vegetable, some fruits and eggs.